


We knew we needed heaps of people spreading the word about Enda, it was the only way we were ever going to have a successful Kickstarter campaign. To give thanks, and encourage people to take the extra effort, we wanted to offer some rewards to people who referred their friends.
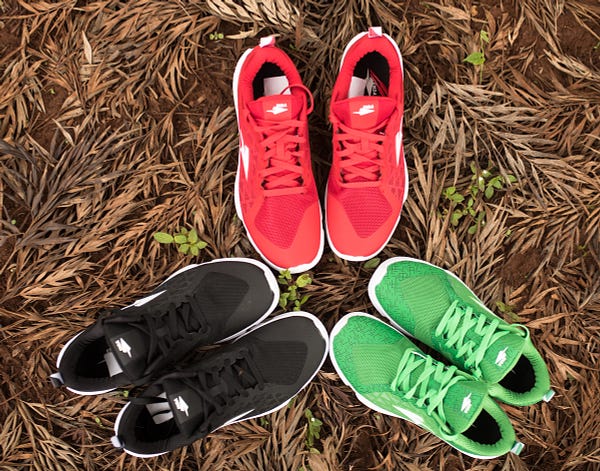 Top quality made in Kenya running shoes.
We couldn’t find anything off the shelf, so we created our own. The result was a 10% boost to our campaign, so certainly worth it.
We’ve been asked a few times how we set this up, so wanted to create a guide you can follow. To start, we got the basis of how to do this from the affiliate program Roost stand used during their Kickstarter campaign, so it’s worth checking it out as a reference. We did a fair number of things differently though, so what follows are full details of what our setup looked like.
I’ll break this down into four sections:
- Overview
- List of tools
- Detail on set up
- Tracking results and updating
Overview
From a user point of view, here’s what things look like:
The user is encouraged to participate in the referral program. They then complete a form to enrol, supplying their name and email address. They then receive an email with a unique sharing code — which they can share on social media via email. They then periodically receive an email letting them know how many people they have recruited, what the rewards for recruitment are, and some tips on how to recruit more people.
Here’s what users saw when we rolled our the program on the 2nd day of our campaign:
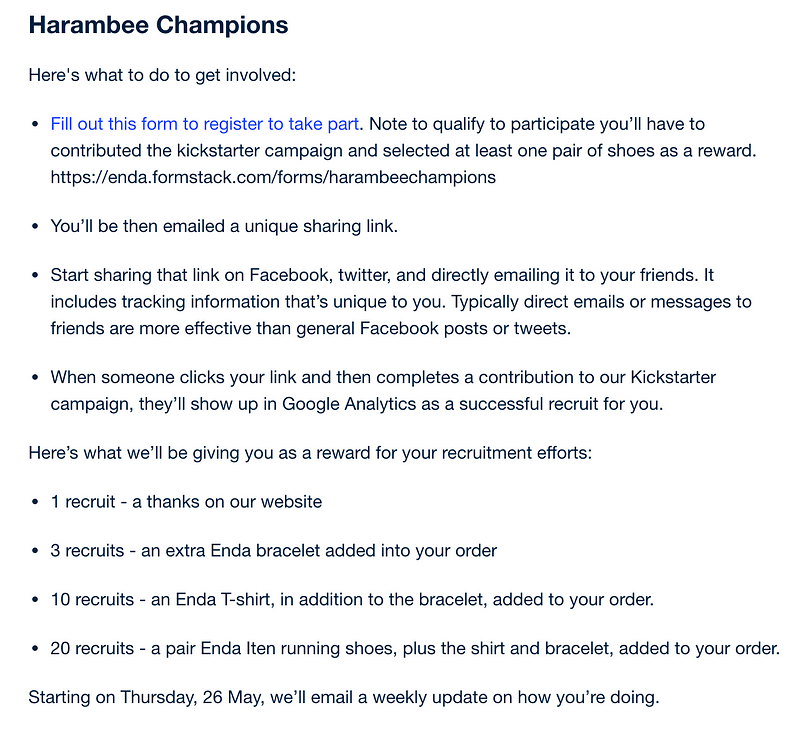
Here’s how the process works from a back end perspective:
- Using Formstack, we collected people’s names and email addresses.
- Then we used Zapier to pull Formstack data as well as unique user ID and send it to Bit.ly to create a unique referral short link for each user.
- Zapier then triggers an email from Mandrill, to send the unique link to users.
- Zapier also writes the user details, including their unique link, to Google Sheets.
- Then using Google analytics we would see the traffic and conversions each user was driving and record it in google sheets. We’d then turn on Zapier to trigger a different Mandrill email informing the recruiter of their current results and some tips on how to recruit more people.
List of tools
Before getting into the details on setup, you should set up an account with each of these services as it will be easier to have them open and ready as you go through the setup.
Zapier
Lets you automate tasks and pass data between different web apps. Basically a user interface for creating API calls. Each process of communication between apps is called a “Zap”. There’s one key Zap holding this whole process together.
Fromstack
Lets you create online forms to collect data. Critically, whenever a new entry is recorded, you can trigger an action via Zapier. It also creates handy unique user IDs whenever someone completes the form.
Mandrill
Now owned by Mailchimp, Mandrill is a transactional email tool. Where Mailchimp is for mass mails, Mandrill is for individual emails triggered by a certain event.
You’ll need to spend some time configuring Mandrill so you are able to send email from your own domain. It’s worth doing this while setting up the account as it takes a while.
Google Sheets
Online excel. Google Sheets will serve as a sort of database for this exercise. If you’re like me, and love Google Sheets & Google Forms, it’s tempting to want to ignore using Formstack, but sadly it just doesn’t work. You need Formstack to trigger the Zapier action.
Bit.ly
A free link shortening tool.
You’ll need to configure a URL to be used with your short links. We bought Enda.run for this purpose. It can take a while for this to get set up, so make sure to configure URL’s DNS now.
As we’ll be using the Bit.ly API to create short URLs, you’ll need to get your authentication key here.
Google Analytics
Free web analytics, with solid ecommerce tracking for Kickstarter.
You’ll also be using Google Analytics custom URL builder. This tool allows you to add additional information on to each URL to better track each user. Since you’ll eventually be automatically creating a unique URL for each recruiter, this means you’ll be able to individually track the traffic they are sending to your Kickstarter campaign.
Detail on setup
I recommend doing this whole setup before you campaign launches so you can test if everything is working. Then, when your campaign launches you’ll simply update your email in step 4 below, and you’ll be good to go.
Here’s what you need to do to set up the referral system:
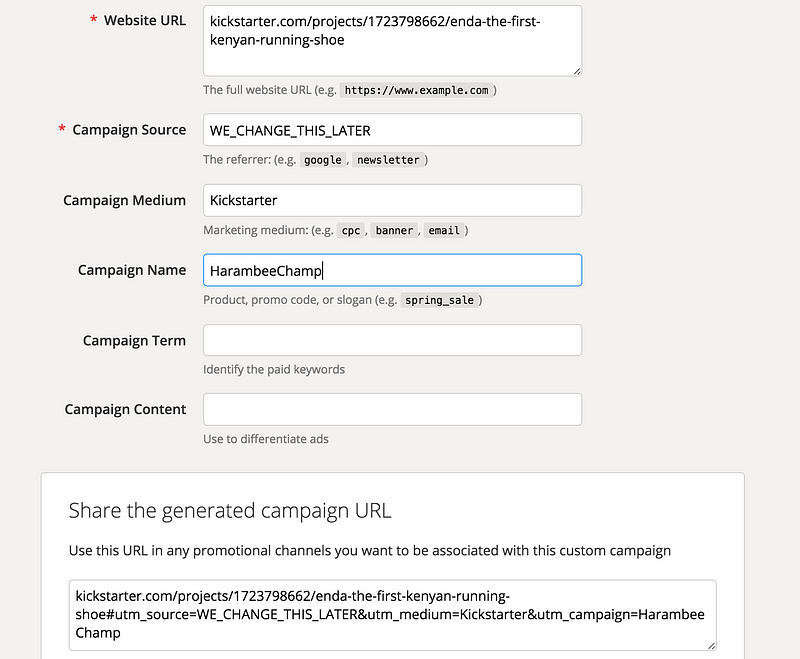
1Go to Google Analytics URL builder and build the basic’s of your custom tracking email. For ours the process looked like this:
2Go to Formstack and create a new form collecting first name, last name, and email address.
3Go to Google sheets and create a new sheet with the columns headings: first name, last name, email address, user ID, unique URL, sessions, transactions, and updated.
4Go to Zapier and create a new Zap. The first step of the zap, the triggering action, will be a new form submission from Formstack from the form you’ve just created
5Then create a second step of the Zap, a web hook “Get” action. You’ll be using the get action to send an API call to Bit.ly to create a shortened version of the custom URL for each user. To do this, your URL will be two parts: 1) the API call to Bit.ly, with your access key and 2) the custom tracking URL
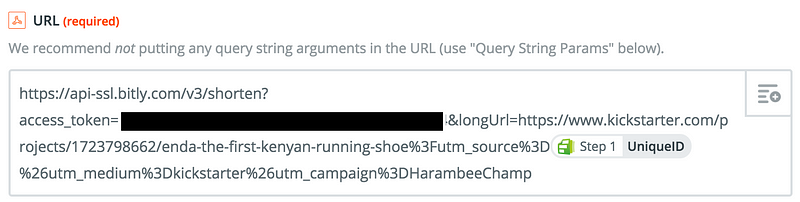
For the Bit.ly call, the detailed instructions from Bit.ly are in their API documentation here. Basically it means what you’re putting into the URL field will be:
https://api-ssl.bitly.com/v3/shorten?access_token=YOUR_ACCESS_TOKEN&longUrl=YOUR_CUSTOM_URL
You should already have your access token from when you set up Bit.ly, so the only thing left is to insert the custom URL we created in step 1, but change the “WE_CHANGE_THIS_LATER” portion to be pulling in the unique user ID from Formstack. The menu in the upper right of the input field gives you a list of available variables.
In the end, it looks like this:
Two things to note here.
First, you can experiment with this whole set up by using another URL, like your main website, and then just substituting in your Kickstarter link once you launch the campaign.
Second, you might notice in my example things like “%26”. This is special character encoding for URLs. You might be able to get away without it, but if your tracking details are getting stripped out of our URLs when sent to Bit.ly or you’re having any other issues with the, you might want to try swapping out special characters like / and & for their UTF-8 encoding, which can be found here.
6The next step of your Zap will be Mandrill sending an email. Pulling the recruiter’s name and email from Formstack, and the newly created URL from Bit.ly Get action, we’ll send them an email with their custom link so they can start recruiting.
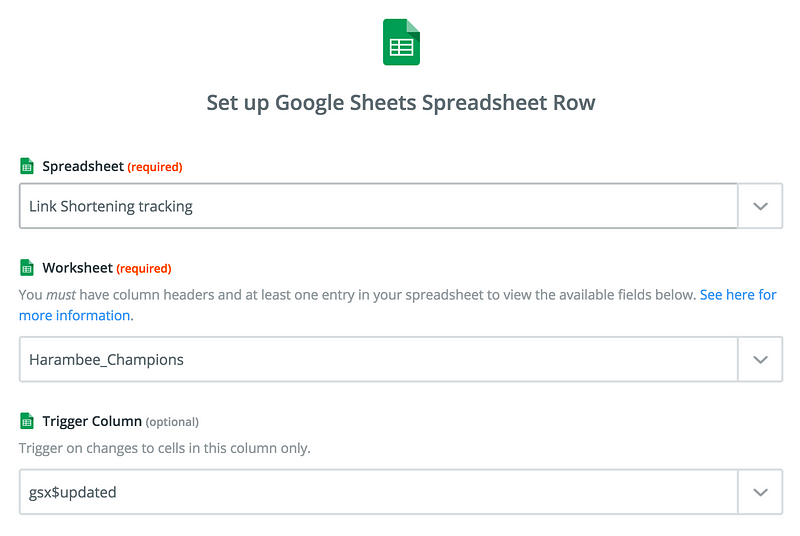
7The last step of the Zap is a dumping all the user data to Google Sheets. So select the action of creating a spreadsheet row in Google sheets and then from Formstack write their name, email, and unique ID in the appropriate fields. Pulling from the Bit.ly Get action (step 2 of the Zap), you’ll add their unique URL.
 At this point, your setup should look like this.
8Once you’ve set all this up, you can check it the process by filling out the Formstack from. There are 4 things you should see immediately as a result:
- In Formstack, look for a new entry.
- In Bit.ly you see a new URL, which includes tracking information unique to each Formstack submission. Clicking the new Bit.ly link should sent you to your target test URL (or Kickstarter campaign) with the UTM tracking details visible.
- The email you entered into Formstack should receive an email with the Bit.ly link.
- There should be a new Entry in Google sheets with the details entered into Formstack as well as the unique Bit.ly link corresponding to that user.
Tracking results and updating
In order to track recruitment results, you simply use Google Analytics ecommerce integration with Kickstarter. This is a fairly standard set up: here is how you add Google Analytics to your Kickstarter campaign, and here is how you turn on Analytics ecommerce tracking.
Once those are set, and your campaign is live, and people are clicking on referral links, you’ll start seeing them show up in your Google Analytics report.
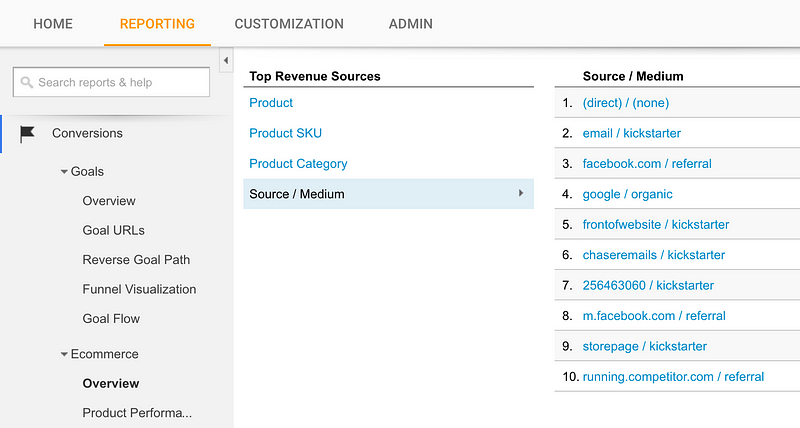 Source 256463060 was our top recruiter.
It’s then just a matter of matching the source with the corresponding unique ID in Google sheets to see how many conversions each person is driving to your campaign. Earlier I had you add “sessions” and “transactions” columns to your Google sheet. These will be the two key variables you’ll be updating, and they tell you the overall traffic and actual contributions respectively.
There is a way to integrate Analytics with Google Sheets, we didn’t use this for the campaign as we had a bit of help doing weekly updates of our recruitment results.
You’ll want to send regular emails letting your recruiters know how they’re doing, and encouraging and coaching them on how to bring more people into the campaign. For this, you’ll be going back to Zapier and create a simple two step Zap:
1) The triggering action is updating a row in your Google sheet. Earlier I had you create an “updated” column in your Google sheet. You want this to be the column triggering the action, and you’ll change to the current date in order to send an email to that user. It also lets you know when each recruiter last received an email.
2) The action you’re triggering is an a Mandrill email, in it you’ll pull data from your Google sheet including the users name, their current number of recruits, and their unique link in order to update them on their progress and nudge them to share their unique link some more.
That’s the whole thing. Hopefully you find it useful as you build your own Kickstarter campaign, and best of luck with your crowdfunding efforts!

